")
| NSYSA | |
| OYSA | |
| TOPSoccer | |
| Information | |
| Logon |
") |
FAQ |
How to Create a Calendar Event
This FAQ is designed to show the Staff Member how to create a Calendar Event.
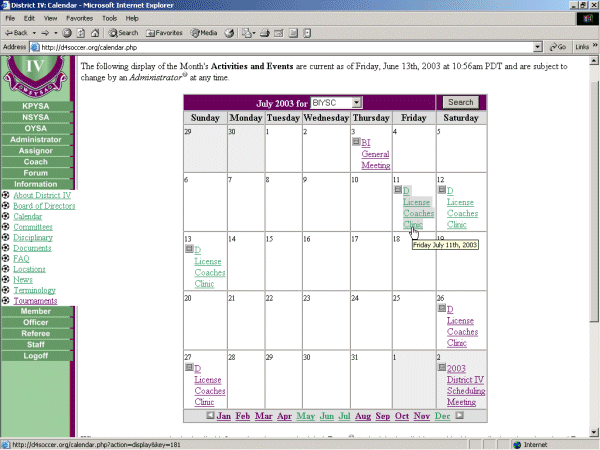
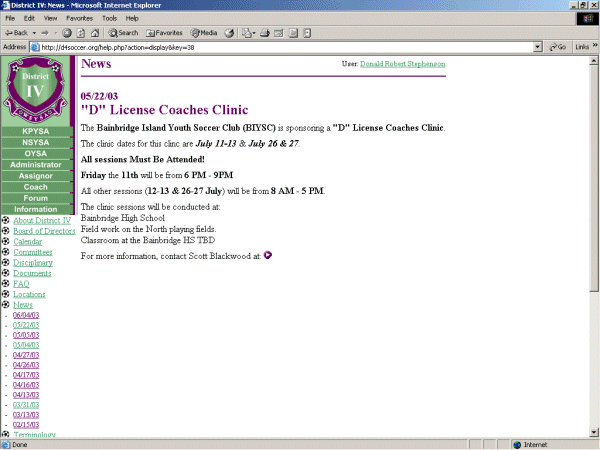
Below you see a Calendar that is selected to view BIYSC events. The cursor is pointing to the "D" License Coaches Clinic event on 07/11/2003.
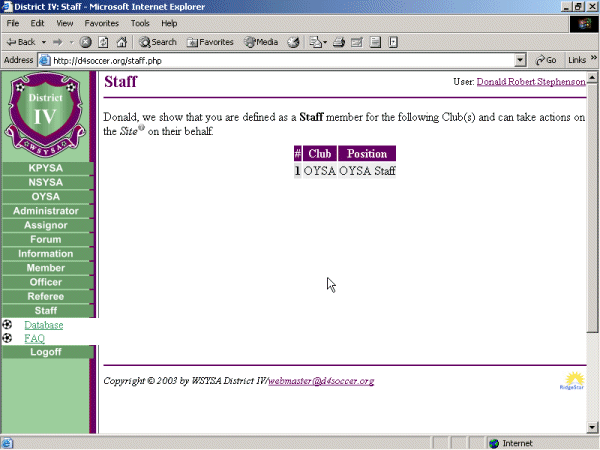
- To Commence the creation of a new Calendar Event - Select Staff:
This Screen will show the Staff Member all levels (organizations) that they have the rights to work with on the Site.
In this case, the Staff Member is dsesignated only as a Staff Member for OYSA. Therefore, this individual can only Create/Edit/Delete or work on items designated for OYSA.
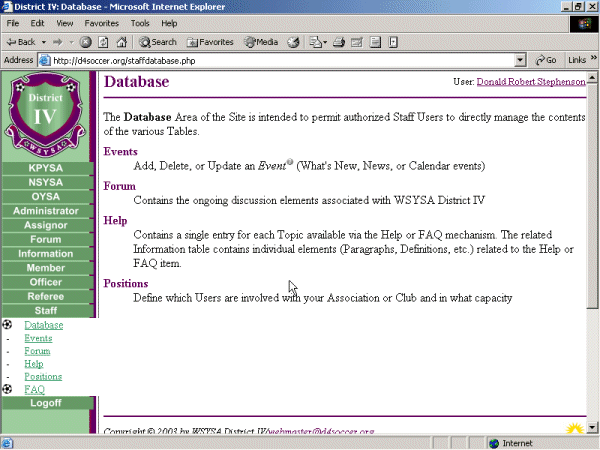
- Select Database
This opens the Database Section which lists and explains the individual functions available to the Staff Member.
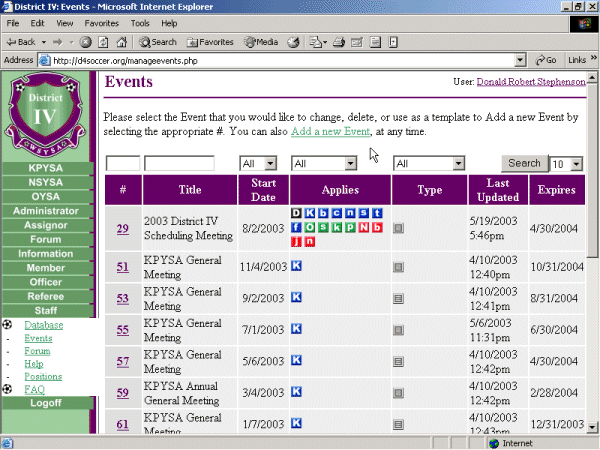
- Select Staff: Database Events
This opens the Events function.
Note that it opens up a screen that lists all the Events (Calendar, News, What's New?) in ths system.
The reason that all are listed is to allow a Staff Member to Add an existing item to be viewed at their level if so desired.
At the top of the display, you can elect to reduce the number of items listed by using any combination of the Drop Down Boxes and then selecting Search.
- Start Date - is self explanatory.
- Applies - pertains to the Group/Level this Event pertains to
- Type - gives you the option to select only Calendar or What's New? Events
To Add a New Event, you would select the Add a new Event hyperlink at the top of the screen.
- Create the Calendar Event by inputing the appropriate data into the appropriate fields as described below.
- Sample Input
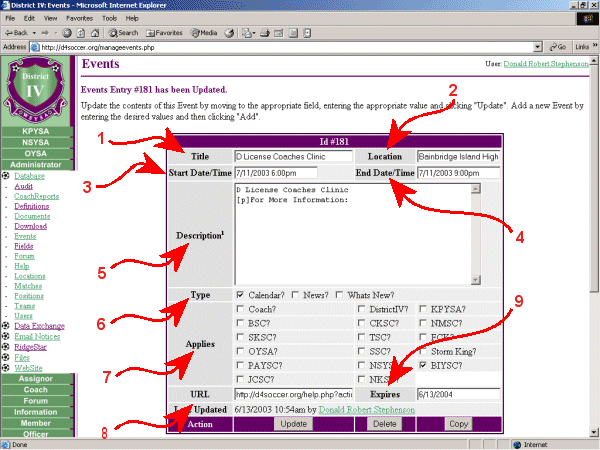
- Title
Enter the Title of the Event.
- Location
Enter the Location Title for the Event.
Remember that it would be best to use locations that are in the "Locations" Table so members can easily obtain maps and directions.
- Start Date/Time
Enter the Start Date and Time for the Event.
Use the format of mm/dd/yyyy hh:mm for your entry.
- End Date/Time
Enter the End Date and Time for the Event if known. If unknown - leave blank.
Use the format of mm/dd/yyyy hh:mm for your entry.
- Description
Enter the Description or Comments pertaining to the event if known.
You Use format the text using the codes identified in Information: Terminology (Text Format).
- Type
Select "Calendar?" to make this a Calendar Event.
- Applies
Select the Group that this Calendar Event Applies to.
Remember, you can only create new Events for Groups that you are a Staff Member for.
- URL
Enter the URL for any additional Reference you care to make available from this event that will display if [More?] is selected.
- Expires
This defaults to 1 Year from the creation date. Feel free to modify this date if necessary to any period shorter than this 1 Year but not any longer.
- Update
Ensure that when you have completed your entries that you save the data by selecting Update.
- Sample Display
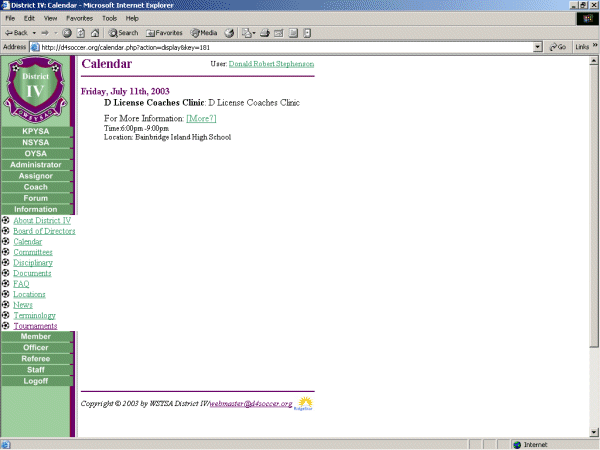
- More Information
If you select [More?] on the Calendar Event, you will be taken to the Link you placed in the URL Field - See Below.
- This concludes the FAQ for Creating a New Calendar Event!
| Copyright © 2026 by Northwest Sound Youth Soccer Association/webmaster@NSYSASoccer.org |